Whatsapp:+86 17852301313 Email:tinghe.lv@yimaotomg999.com
How to Fix Clogged Drip Emitters (Without Replacing Everything)
The first sign is always the same
A tomato plant looks thirsty even though the system ran that morning. You crouch down, poke at the soil, and sure enough: bone dry around one emitter while the one two feet away is dripping fine. The first thought is always “I need to replace the whole line.”
You probably don’t. I’ve fixed hundreds of clogged emitters and maybe 5% of the time the tubing itself was the problem. Most clogs are fixable in under an hour with stuff you already have.
Here’s what actually causes the clog, how to clear it, and what to install so it doesn’t come back.
Why drip emitters clog (it’s usually one of three things)
Drip emitters have tiny internal passages. A 1 GPH emitter might have an opening smaller than a pinhead. That’s by design — it’s how they regulate flow without moving parts. It’s also why they clog.
The three culprits I see most often:
- Mineral scale. If you’re on well water or have hard municipal water, calcium and magnesium carbonate build up inside the emitter over time. Looks like white crust. Same stuff that fogs up your shower head.
- Algae and bacteria. Warm water sitting in black poly tubing is basically a bacteria nursery. The slime that forms — biologists call it biofilm — can gum up emitters from the inside. Common in above-ground systems where tubing gets direct sun.
- Dirt and sand. If your filter isn’t doing its job, or you don’t have one, fine sediment works its way into the emitter labyrinth and packs tight. Once it’s in there, water pressure alone won’t push it out.
Root intrusion is a fourth one, but it’s rarer. If roots have grown into an emitter, the tubing is usually compromised too, and that section needs replacing.
Step 1: Figure out which emitters are actually clogged
Don’t just start ripping things apart. Run the system for five minutes and do a walk through:
- Check each emitter with your finger. Is water coming out? Is it a steady drip or a pathetic trickle?
- Mark the bad ones with flagging tape or a sharpie on the tubing. I use blue painter’s tape.
- If every emitter on one lateral line is weak or dry, the problem is probably upstream: a kinked line, a crushed section, or a clogged connector. Skip to the flushing section.
- If it’s random emitters scattered around, those are individual clogs. That’s what we’ll fix.
Step 2: Flush the lines first
This is the thing people skip. They go straight to pulling emitters out and end up pushing more crud into clean ones.
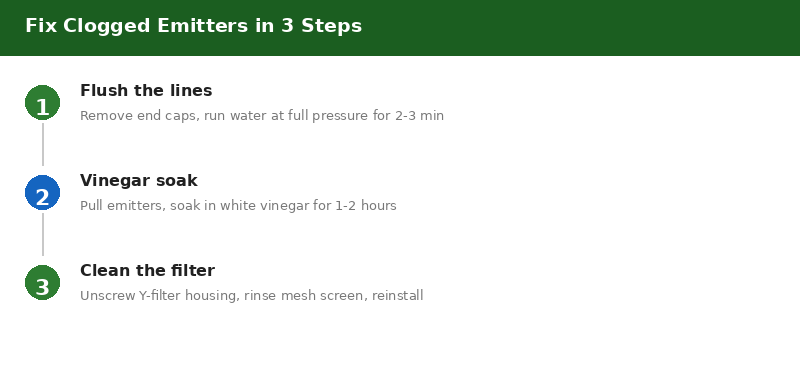
Remove the end caps or flush valves at the end of each lateral line. Turn the system on at full pressure for two to three minutes. You want water blasting out the open ends. The idea is to flush any loose sediment through the tubing before it finds another emitter to clog.
If you have a 1/2″ poly tubing system (the most common for home gardens), the flush should run clear by the 90-second mark. If it’s still brown or murky after three minutes, your source water has a sediment problem and you need a better filter — but we’ll get to prevention later.
Put the end caps back on when the water runs clear.
Step 3: Pull and soak the clogged emitters
Mineral scale, which is what I run into on about 70% of service calls, is where white vinegar works surprisingly well.
- Twist or pull the emitter off the tubing. Most 1/4″ barbed emitters come out with a firm pull. Button emitters on 1/2″ tubing might need a goof plug remover tool (or needle nose pliers if you’re careful).
- Drop the emitters in a jar of plain white vinegar. The cheap stuff, not cleaning vinegar — the 5% acidity is what you want.
- Let them soak for 1–2 hours. If the scale is really thick, overnight won’t hurt.
- Rinse with clean water. You should see the flow pattern return to normal. If an emitter still won’t pass water after a vinegar soak, it’s dead — replace it (they’re about $0.30–$0.80 each).
For biological gunk — that slimy algae situation — vinegar won’t cut it. Mix a chlorine solution: one tablespoon of unscented household bleach per gallon of water. Soak for 30 minutes, then rinse thoroughly. Don’t skip the rinse. Chlorine residue will kill soil microbes when you reinstall.
A word on chlorine: some irrigation suppliers sell “line cleaner” products that are basically stabilized hydrogen peroxide. They work too, but they cost four times as much as bleach and do the same thing. I use bleach.
Step 4: Clean or replace your filter
If you found sediment in your emitters, the filter is either clogged or undersized.
Most home drip systems use a Y-filter or T-filter with a stainless steel mesh screen. Unscrew the housing, pull the screen, and rinse it under running water. If the mesh is torn or the O-ring is cracked, replace the whole thing — a new Y-filter is about $15–$25 and beats buying 50 new emitters.
Mesh size matters. For drip emitters, you want 120–200 mesh. A 120-mesh screen catches particles down to about 125 microns. If you’re on pond water or a shallow well, go with 150 or 200 mesh and clean it monthly.
No filter at all? That’s your problem. Install one immediately after your pressure regulator and before the first lateral line splits off. It’ll take 15 minutes with two hose clamps.
Step 5: Check your pressure
Low pressure can mimic clogs. If water is barely dribbling from otherwise clean emitters, put a pressure gauge on the line. Most drip emitters are designed for 20–30 PSI. Below 15 PSI, flow drops off sharply.
A pressure regulator is cheap insurance. Senninger and Rain Bird both make 25 PSI preset regulators for under $15. They thread onto a standard 3/4″ hose bib or PVC fitting. If your system doesn’t have one, install it now — high pressure doesn’t just waste water, it blows fittings apart.
Prevention: what stops clogs from coming back
Once you’ve cleared things up, three things will keep them clear:
- Flush your lines twice a season. Once at startup in spring, once mid summer. Takes five minutes. Pull the end caps, run full pressure, done.
- Clean your filter monthly. I set a phone reminder for the first of each month during irrigation season. It’s a 90-second job that saves hours of troubleshooting.
- Use a pressure regulator. If you’re on municipal water with pressure above 40 PSI, you need one. High pressure forces sediment deeper into emitters.
If you’re dealing with hard well water and mineral scale keeps coming back, consider installing an inline polyphosphate cartridge filter. They run about $40–$60, last a full season, and the polyphosphate binds to calcium before it can crystallize inside your emitters. It’s the same tech used in scale-prevention filters for tankless water heaters.
When it’s actually time to replace things
I try not to sell people parts they don’t need. But sometimes the fix is replacement:
- If more than half the emitters on a line are clogged solid and won’t clear with vinegar or chlorine, and you’ve been fighting this for multiple seasons, replace the emitters. It’s faster.
- If the tubing interior is coated with biofilm that won’t flush out — you can check by cutting a small section at the end and looking inside — replace the lateral line.
- If you’re running drip tape (the thin-walled flat tubing used in row crops) and it’s clogged, don’t bother trying to fix it. Drip tape emitters are molded into the seam and can’t be cleaned. Replace it.
But for 90% of home garden drip systems with standard button or barb emitters on poly tubing: flush, soak, filter, done. You’ll spend $0 on vinegar you already own and maybe $20 on a new filter screen. Your tomatoes will forgive you.